Back
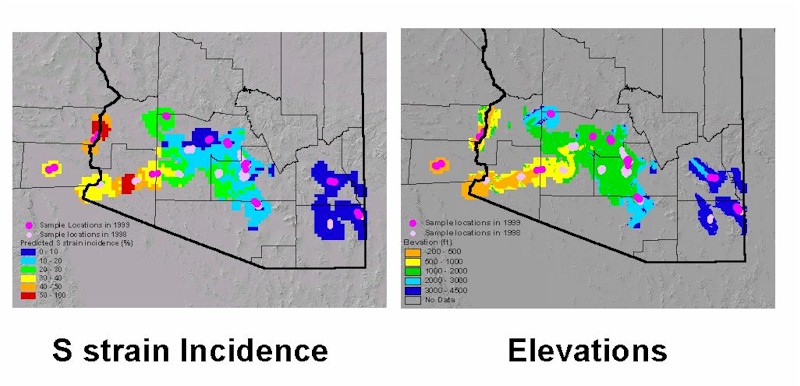
Figure 4. Side by side comparison of S strain incidence and elevation maps.