Please keep in mind that there are usually several ways to complete the same task. For example, the processes described below could be done with Export options instead of import options. If you don't like the methods described below, then please search the ArcGIS help documents or try new things through trial and error.
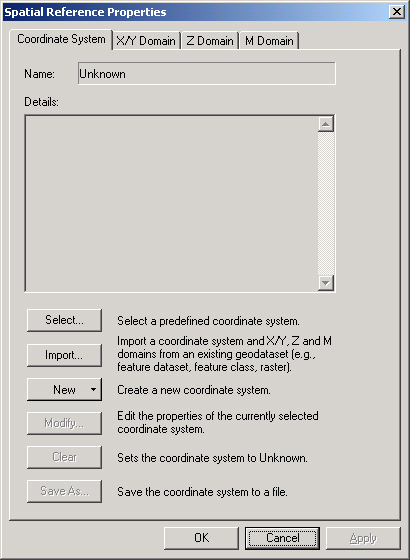
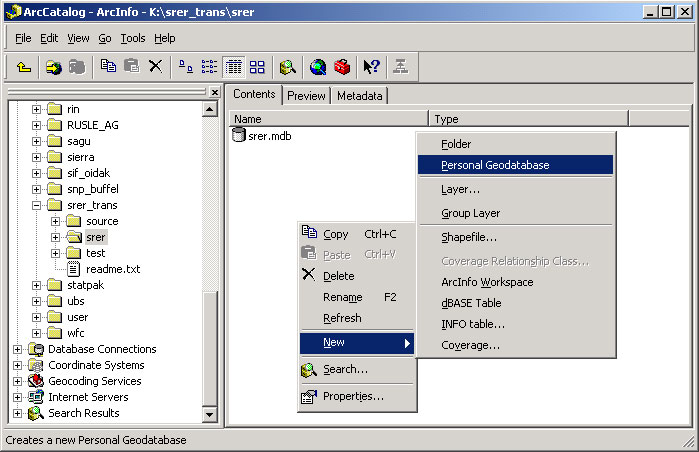
Fig. 4. How to specify a coordinate system in a personal geodatabase. |
Import Data (Feature Classes and Tables)
- Open ArcCatalog.
- Navigate to the personal geodatabase and click on it in the tree view.
- If you want the data stored inside of a feature dataset, then navigate to the feature dataset before you continue.
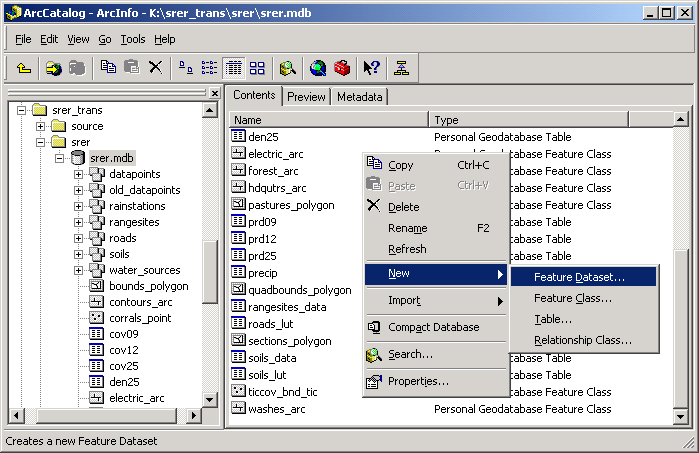
- Either right click on the personal geodatabase (or feature dataset) or right click in the window to the right of the tree view and choose Import --> Cover to Geodatabase Wizard, Import --> Cover to Geodatabase, Import --> CAD to Geodatabase, Import --> Shapefile to Geodatabase, Import --> Shapefile to Geodatabase Wizard, or Import --> Table to Geodatabase (Fig. 5).
- No matter which option you choose, you will have the ability to change the coordinate system/projection as well as the topology you wish to import. If this is your first time and you are importing a coverage or shapefile, you should use the wizard to get an idea of the required information/processes. You can do the same things without the wizard, but the wizard makes sure you don't skip anything.
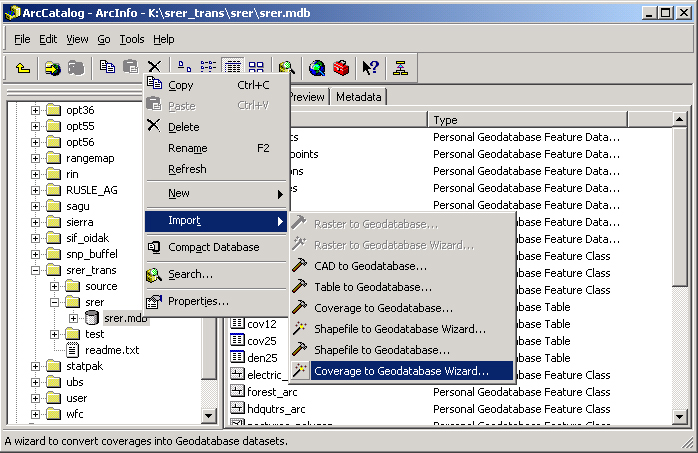
Fig. 5. How to import data into a personal geodatabase. |
Using the Import Wizard
Please refer to the images below when reading the following example.
- On the first screen of the wizard, you will need to browse to the data layer you wish to import and put a check next to the topology you wish to import. In this example, I am importing points.
- The second screen allows you to choose where to import the data. If you right clicked on a feature dataset, then this will be chosen for you. If you right clicked on a personal geodatabase, then you can choose any of the three options. In this example, I chose to import it to an existing feature dataset.
- The third screen allows you to specify the remaining parameters. You should always choose to specify the parameters so you can check and/or change the coordinate system.
- The fourth screen provides a brief overview of the spatial reference of the data you are importing. If you wish to change it or define it, click on the Change button. It is very important that you define the coordinate system at this point if it is not already defined, especially if they are going to be stored inside of a feature dataset. Remember that the coordinate system of a feature class and its feature dataset must be identical, so you can import the parameters that you defined for the feature dataset.
- The fifth screen allows you to name the imported data as well as choose to Set Options. In this example, I chose to set additional options instead of accepting the defaults.
- If you choose to set additional options, you will see this screen. It allows you to set the resolution of the grid index for the data.
- This screen will also appear if you choose to set the options. This screen allows you to change the field names or delete them altogether if you so desire.
- The final screen shows you an overview of the options you set during the wizard. When you click on finish, ArcCatalog will import your data.
Create Feature Classes and Tables
- Open ArcCatalog.
- Navigate to the personal geodatabase and click on it in the tree view.
- If you want the feature class stored inside of a feature dataset, then navigate to the feature dataset before you continue. Remember that you cannot put tables inside of a feature dataset.
- Either right click on the personal geodatabase or right click in the window to the right of the tree view and choose New --> Feature Class or New --> Table (Fig. 6).
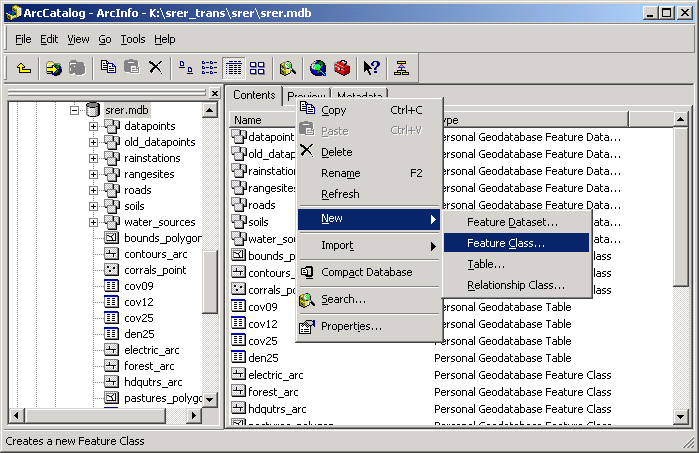
Fig. 6. How to create a new feature class or table in a personal geodatabase. |
See the figures below as a reference for the remaining steps.
- Give the feature class or table a name and an alias, then click Next.
- If you are making a new feature class, you must specify if it will be storing simple features (such as points) or annotation, network, or dimension features.
- Accept the default storage parameters (unless you know a keyword that will specify the parameters for you) and click on Next.
- Either specify field names or click on Import to import field names from an existing table or feature class. Click on Finish.
Create Relationship Classes
- Open ArcCatalog.
- Navigate to the personal geodatabase and click on it in the tree view.
- If you want the relationship class stored inside of a feature dataset, then navigate to the feature dataset before you continue.
- Either right click on the personal geodatabase or right click in the window to the right of the tree view and choose New --> Relationship Class (Fig. 7).
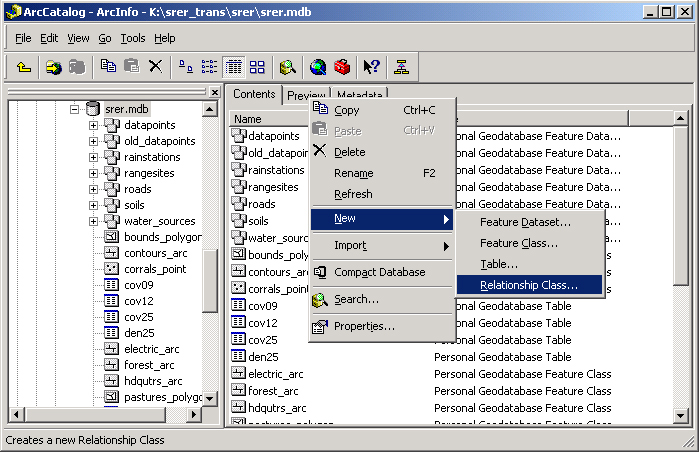
Fig. 7. How to create a new relationship class or table in a personal geodatabase. |
See the figures below as a reference for the remaining steps.
- Give the relationship a name, and then choose the origin and the destination datasets. Click Next.
- In a "One to Many" relationship (which you specify later), the origin dataset should be the one with the "One" side of the relationship, and the destination dataset is the one on the "Many" side of the relationship.
- Specify whether you want a "Simple" or a "Composite" relationship. Only choose the composite relationship if you want records in your database to be deleted when you delete geographic features. Click Next.
- Give labels to the relationship directions so that you can differentiate between actions that move in one direction or the other. Click Next.
- Specify what type of relationship it is (one to one, one to many, or many to many). Click Next.
- You now have the opportunity to specify if there will be attributes for this relationship. Usually there is not. Click Next.
- Now you must select the primary and foreign keys that relate the data. Click Next.
- The final screen shows an overview of the options that you chose. Click Finish.
Information | Knowledge Base | Back
CALS Privacy Statement